Deploying Supabase Migrations from GitHub Actions
In this short post, I’ll demonstrate how to configure a GitHub Actions workflow to deploy migrations to a Supabase project. While this is an incredibly easy task, I always have to re-learn how to do it with each new hobby project, so I thought I’d spare you the struggle!
This post will assume you have a GitHub repository and a Supabase project, as well as basic knowledge of how to configure GitHub Actions and how to create migrations using the Supabase CLI.
Secrets
The real crux of this process is gathering and configuring the necessary secrets from your Supabase project and adding them to your GitHub repository. You will need three pieces of information:
Supabase Access Token
Supabase Project Ref
Supabase DB Password
Access Token
To find your Supabase access token, login and open your dashboard. On the left-hand side, click the “Access Tokens” menu option.
From here, click the “Generate new token” button and give it a descriptive name. Once your token is generated, save it somewhere secure (like a password manager).
Project Reference/ID
The second piece of information you need is your project ref.
To find this:
Open your project dashboard
Navigate to the “Project Settings”
Find the “Reference ID” in the “General settings” card at the top
Database Password
You should have created (and saved) your Supabase database password when you created your Supabase project. If not, or if you didn’t save it anywhere, you can reset it. I always forget to save it the first time around, so I’m very familiar with the reset flow:
Open your project dashboard
Navigate to the “Configuration” > “Database” page in the left-hand menu
Scroll down to the “Database password” card
From here, click the “Reset database password” button and follow the prompts. This time, make sure to save it somewhere secure!
GitHub Actions Secrets
Now that we have all three pieces of information, we can add them to our GitHub Actions workflow.
First, let’s add these values to the repository secrets.
Adding a Secret
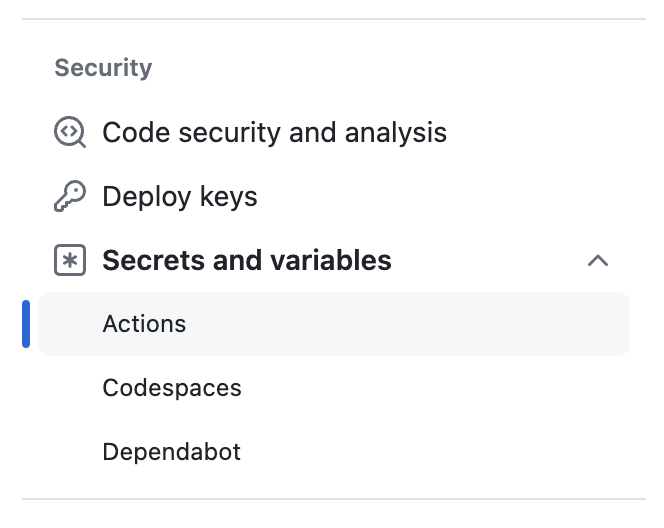
To add a secret, open your repository and click the “Security” > “Secrets and Variables” > “Actions” link.
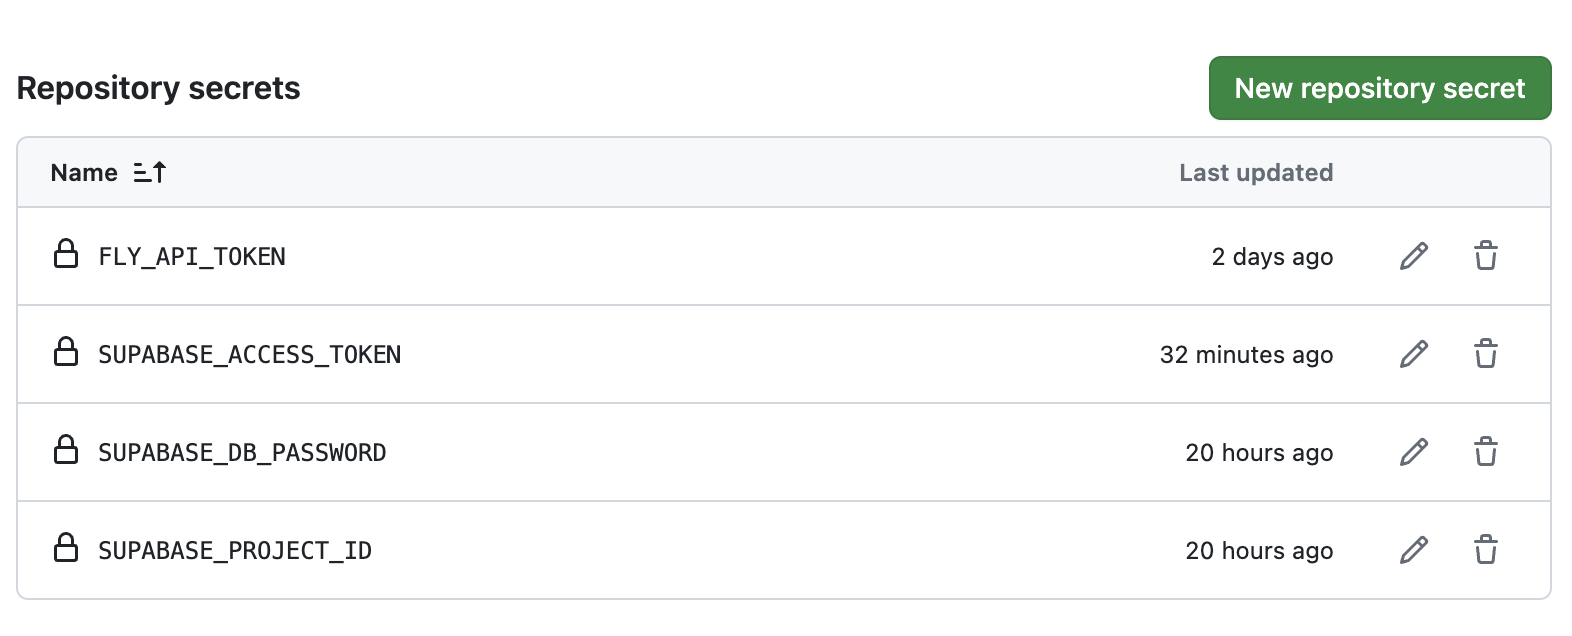
On the “Actions secrets and variables” page, click the “New repository secret” button and follow the prompts to add each of your Supabase values.
Workflow
Finally, we can add the necessary steps to our GitHub Actions workflow.
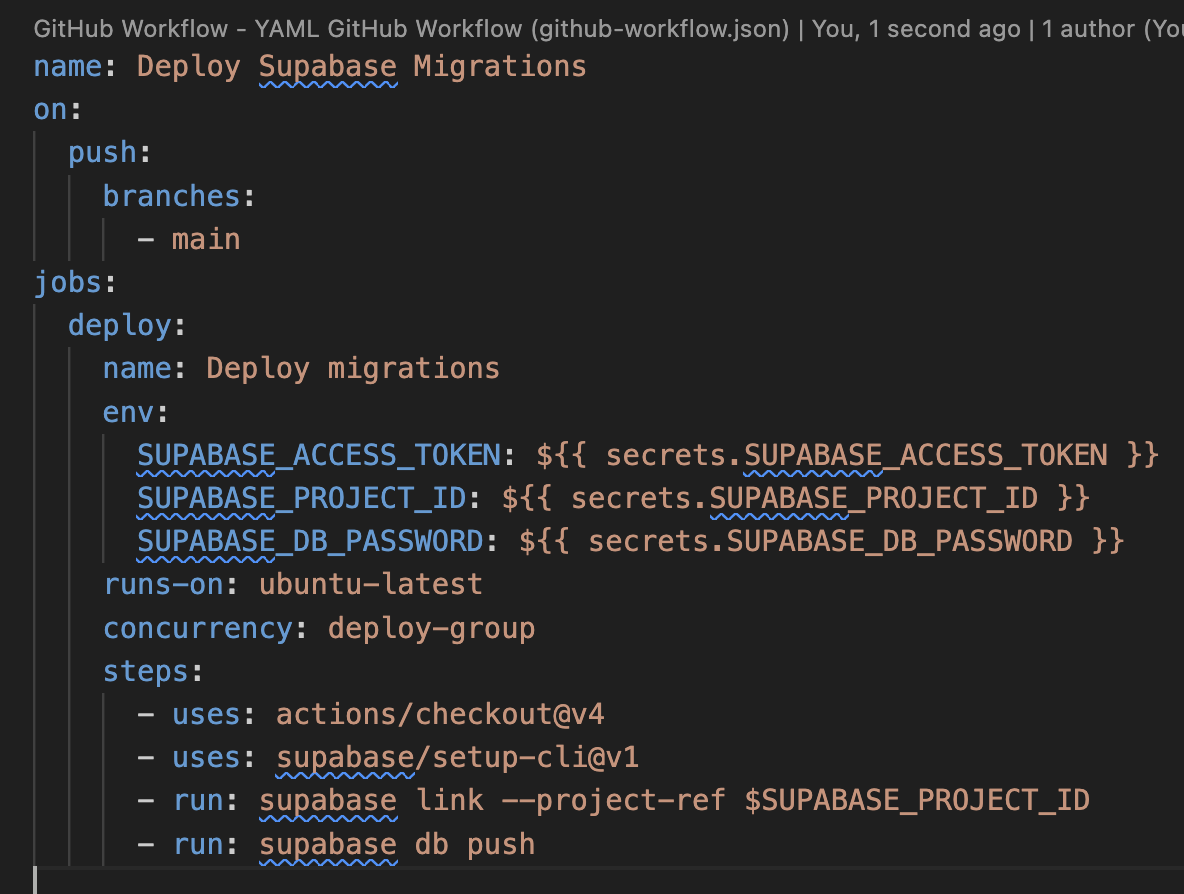
Example Workflow
In the example workflow above, we’ve configured the three environment variables in the env section, pulling them from our repository secrets. It’s important that the access token and database password are added to the correctly-named variables, as pictured above. Your project reference can use any name.
Then, in our steps:
Use the
supabase/setup-cliaction to install the Supabase CLIRun
supabase linkwith your project reference to link the code inside the container to your Supabase projectRun
supabase db pushto deploy any pending migrations
That’s it! The repository is now configured to deploy pending migrations to the Supabase database with each push to main.
Thanks for reading and I hope you found this helpful!


